How to Trim Dog Nails Safely: Step-by-Step Guide
Master dog nail trimming with confidence! Learn professional techniques, avoid the quick, and turn nail day from nightmare to no big deal.
Oh boy, here we go again! It's that time when you glance at your dog's paws and realize those nails are starting to look like something out of a horror movie. If you're breaking into a cold sweat just thinking about trimming them, trust me, you're not alone in this struggle. Learning how to trim dog nails safely: step-by-step guide essentials can transform what feels like wrestling an alligator into a surprisingly manageable task. Let's face it, most of us would rather clean the entire house twice than face those puppy dog eyes that scream "betrayal!" the moment we reach for the nail clippers. But here's the thing: those clickety-clack sounds on your hardwood floors aren't just annoying; overgrown nails can actually cause your furry friend serious discomfort and health issues. Walking around with long nails is like us trying to walk in shoes that are way too small. Ouch! The good news? Once you master how to trim dog nails safely: step-by-step guide techniques, you'll wonder why you ever stressed about it in the first place. Whether you've got a tiny Chihuahua who acts like you're performing major surgery or a gentle giant who turns into a scaredy-cat at the sight of clippers, we're gonna tackle this together!
Why Nail Trimming Matters More Than You Think
Before diving into the how-to, let's chat about why this whole nail trimming business is such a big deal. Spoiler alert: it's not just about protecting your floors!
The Health Implications of Overgrown Nails
When nails get too long, they push back into the nail bed with every step your pooch takes. Imagine walking on your tiptoes all day long! This unnatural position can lead to:
Altered gait and posture problems
Joint pain and arthritis acceleration
Splayed toes and foot deformities
Increased risk of nail splitting or breaking
Difficulty walking on slippery surfaces
Potential infections from broken nails
The Comfort Factor
Long nails aren't just uncomfortable; they're downright painful. Dogs with overgrown nails often become less active, and who can blame them? It's like having a constant pebble in your shoe. Some pups even develop behavioral issues because they're in chronic discomfort.
The Domino Effect
Here's what many folks don't realize: nail problems can trigger a whole cascade of issues. Your dog starts walking funny to avoid pain, which throws off their alignment, which stresses their joints, which leads to more serious mobility problems down the road. It's basically a hot mess waiting to happen!
Understanding Your Dog's Nail Anatomy: Knowledge Is Power
Alright, before we start wielding those clippers like Edward Scissorhands, we need to understand what we're working with here.
The Quick and the Dead (Well, Not Really Dead)
The "quick" is that pink area inside the nail that contains blood vessels and nerves. Think of it as the living part of the nail. Cutting into it? That's when things get messy and your dog decides you're public enemy number one.
For dogs with clear nails:
You can actually see the pink quick through the nail
Aim to cut about 2mm away from where the pink ends
Lucky you, this is the easier scenario!
For dogs with dark nails:
The quick is playing hide and seek
Look for a small dark circle in the center when viewing the nail head-on
Take tiny cuts and watch for that circle to appear
The Dewclaw Dilemma
Don't forget about those dewclaws! These little thumb-like nails on the inner side of the paw don't touch the ground, so they don't wear down naturally. Left unchecked, they can curl right back into the paw pad. Yikes!
How to Trim Dog Nails Safely: Step-by-Step Guide Tools of the Trade
Having the right equipment makes all the difference between a smooth experience and a total disaster. Let's talk gear!
Types of Nail Clippers
Guillotine Clippers:
Work like a tiny guillotine (hence the name)
Best for small to medium dogs with thinner nails
Easier to control the cutting angle
Blades need regular replacement
Scissor-Type Clippers:
Look like tiny scissors with a notch
Great for larger dogs with thicker nails
Provide more cutting power
Last longer than guillotine types
Grinder Tools:
File down nails instead of cutting
Perfect for dogs who hate the "clip" sound
Takes longer but offers more control
Can get pretty noisy and vibrate
Essential Accessories
Styptic powder (for those "oops" moments)
High-value treats (bribery works, folks!)
Good lighting or a headlamp
Non-slip mat for stability
Nail file for smoothing rough edges
Someone to help (if your dog's a wiggler)
Preparing Your Pup: Setting the Stage for Success
Jumping straight into nail trimming with an unprepared dog is like trying to give a cat a bath without warning. Not gonna end well!
The Desensitization Game
Starting weeks before the actual trimming:
Day 1-3: Simply show the clippers, give treats, put them away
Day 4-7: Touch the clippers to their paws, reward, repeat
Week 2: Make the clipping sound near them (not on nails), treat party!
Week 3: Touch clippers to nails without cutting, massive praise
Week 4: Ready for the real deal!
Creating the Right Environment
Choose a quiet, well-lit area
Pick a time when your dog's relaxed (post-walk is golden)
Have everything within reach
Consider playing calming music
Stay calm yourself (dogs are emotional sponges!)
The Main Event: How to Actually Trim Those Nails
Okay, deep breath. You've got this! Here's your step-by-step roadmap to nail trimming success.
Step 1: Get Into Position
For small dogs, your lap or a table works great. Larger dogs? The floor's your friend. Some folks swear by having their dog lie on their side, while others prefer the standing position. Whatever works!
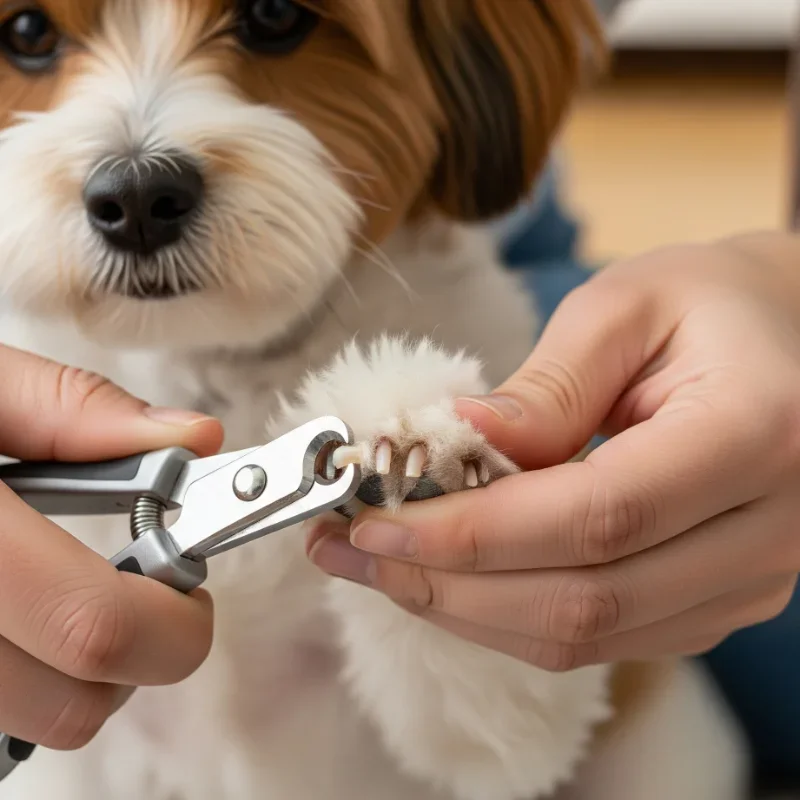
Step 2: Secure the Paw
Gently but firmly hold your dog's paw. Pushing slightly on the paw pad extends the nails, making them easier to see and trim. If your pup's a squirmer, having a helper hold and comfort them is clutch.
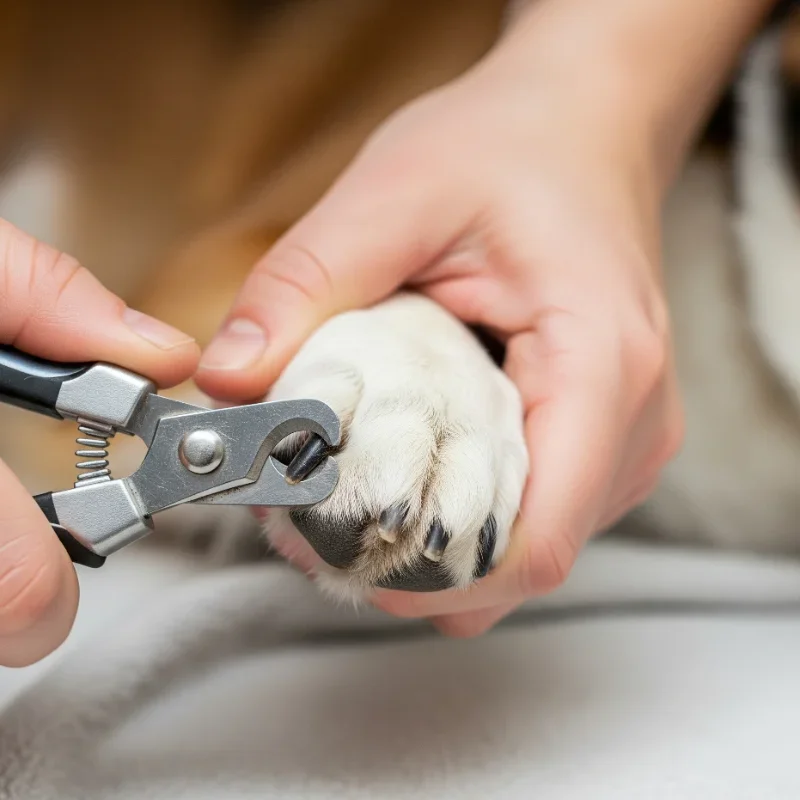
Step 3: Identify Your Cut Line
Look for where the nail curves. That's usually a safe distance from the quick. When in doubt, less is more! You can always trim more later.
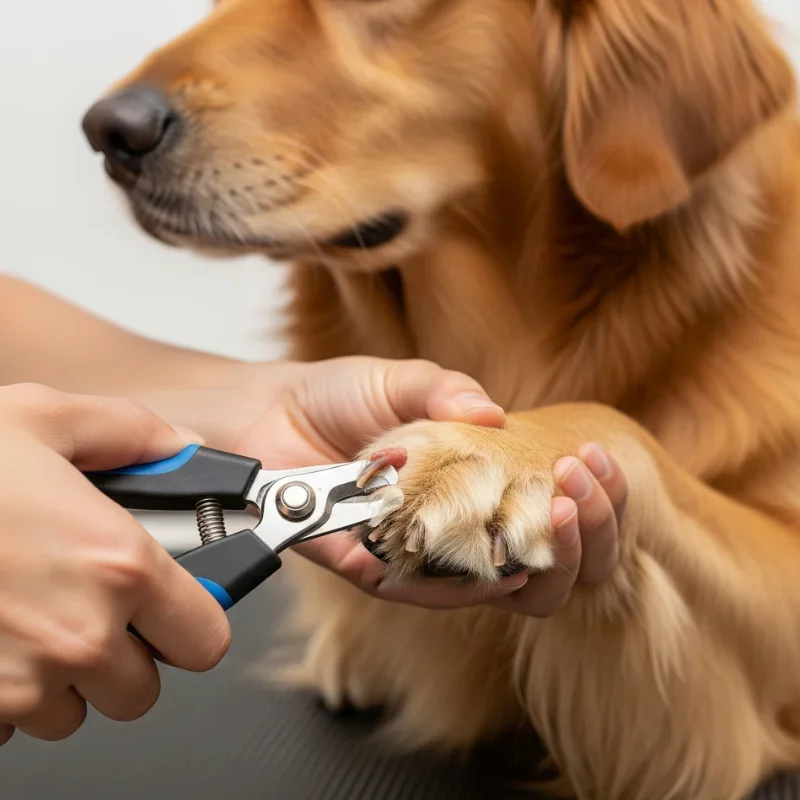
Step 4: Make the Cut
Position clippers at a 45-degree angle
Make a swift, confident cut (hesitation leads to crushing)
Start with the back paws (usually less sensitive)
Trim one nail, praise, treat, repeat
Step 5: The Quick Check
After each cut on dark nails, look at the nail's center. See a small dark dot appearing? Stop right there! That's your warning that the quick is near.
Step 6: Smooth It Out
Use a nail file to smooth any rough edges. This prevents snagging and makes the nails more comfortable.

Troubleshooting Common Problems: When Things Don't Go As Planned
Because let's be real, sometimes our furry friends have other ideas about this whole nail trimming business.
The Wiggle Worm
Got a dog that won't stay still? Try these tricks:
Spread peanut butter on a wall or refrigerator at their height
Use a lick mat with frozen treats
Break sessions into multiple mini-sessions
Consider mild exercise beforehand to tire them out
The Drama Queen
Some dogs act like you're performing amputation without anesthesia:
Start with just one nail per day
Increase treats and praise exponentially
Try different positions or locations
Switch to a grinder if the sound bothers them
The Quick Accident
Oops, you hit the quick! Don't panic:
Apply styptic powder immediately
Hold pressure for 30 seconds
Distract with treats
Keep them calm for a few minutes
The bleeding should stop within 5 minutes
Alternative Methods: When Traditional Clipping Isn't Working
Sometimes, despite our best efforts, traditional clipping just isn't happening. No worries, we've got options!
The Grinding Method
Nail grinders are basically fancy nail files that do the work for you:
Start on lowest speed setting
Touch to nail for 1-2 seconds at a time
Watch for heat buildup
Great for smoothing after clipping too
The Scratch Board Technique
Teaching your dog to file their own nails? Genius!
Get a board covered in sandpaper
Teach them to "shake" or "high five" the board
Gradually increase the scratching motion
Front nails get filed naturally!
Professional Help
No shame in calling in the pros! Sometimes a groomer or vet tech can do in 5 minutes what would take us an hour of stress. Plus, dogs often behave better for "strangers."
Frequency and Maintenance: Keeping Those Nails in Check
How often should you trim? Well, it depends on several factors, but here's the general scoop.
The Rule of Thumb (Or Paw)
If you hear clicking on hard floors, it's trimming time! Generally:
Active dogs on concrete: Every 3-4 weeks
Less active or indoor dogs: Every 2-3 weeks
Dogs with fast-growing nails: Weekly touch-ups
Between Trims
Regular walks on concrete naturally file nails
Scratch boards for maintenance
Check weekly for chips or splits
Keep fur between toes trimmed
Special Considerations for Different Dogs
Not all paws are created equal, and different dogs need different approaches.
Puppies: Starting Right
Begin handling paws from day one
Make it a positive experience with lots of treats
Trim tiny amounts frequently
Their nails grow super fast!
Senior Dogs
Older dogs often have:
Thicker, more brittle nails
Arthritis making positioning difficult
Less patience for the process
Possible vision issues making them nervous
Take it extra slow and gentle with the golden oldies!
Anxious or Fearful Dogs
For the nervous Nellies:
Consider anti-anxiety aids (thundershirt, calming supplements)
Break the process into tiny steps over days
Use highest value treats possible
Sometimes sedation from the vet is necessary
Building Confidence: Your Journey to Nail Trimming Pro
Remember, becoming comfortable with nail trimming is a journey, not a destination. Every dog's different, and what works for your neighbor's Golden Retriever might not work for your Beagle.
Practice Makes Perfect
Start with one nail if that's all you can manage
Celebrate small victories
Keep sessions short and positive
End on a good note, always
The Mental Game
Half the battle is your own confidence. Dogs pick up on our nervousness faster than we can say "sit!" Channel your inner dog whisperer, even if you're secretly terrified.
When to Seek Professional Help
Sometimes, despite our best efforts, professional intervention is the way to go.
Red Flags to Watch For:
Extremely overgrown nails curling into paw pads
Signs of infection (swelling, discharge, odor)
Persistent bleeding after cutting the quick
Extreme aggression during nail trimming attempts
Nails splitting vertically up into the nail bed
The Long Game: Making Nail Care Part of Your Routine
Incorporating nail care into your regular routine makes it less of an ordeal for everyone involved.
Weekly Paw Checks
Make Sunday your paw day:
Inspect nails for length and damage
Check paw pads for cuts or foreign objects
Look between toes for matting or debris
Give a little paw massage (bonding time!)
Monthly Maintenance Schedule
Week 1: Full nail trim
Week 2: Quick touch-up if needed
Week 3: Paw inspection and filing
Week 4: Assess and plan for next month
Conclusion
There you have it, folks! Mastering how to trim dog nails safely: step-by-step guide techniques really boils down to preparation, patience, and practice. Remember, every dog can learn to tolerate, if not enjoy, nail trims with the right approach. Whether you're team clipper or team grinder, the key is making it a positive experience. Your floors will thank you, your dog's joints will thank you, and eventually, even your pup might thank you (probably not, but we can dream!). Keep at it, and soon you'll be trimming those nails like a seasoned pro!
Read next: 15 Dog Room Ideas Your Pup Will Absolutely Love
Frequently Asked Questions
Q1: How can I tell if my dog's nails are too long?
A: If you hear clicking on hard floors, those nails definitely need a trim.
Q2: What happens if I accidentally cut the quick?
A: Apply styptic powder immediately; bleeding should stop within five minutes. Don't panic!
Q3: Can I use human nail clippers on my dog?
A: Only for tiny puppies; adult dogs need proper dog nail clippers for safety.
Q4: How do I trim black nails safely?
A: Take tiny cuts and watch for a dark circle appearing in the center.
Q5: Should I trim dewclaws the same way?
A: Yes, but check them more frequently since they don't wear down naturally.
Stay up to date with our latest ideas!